The first step is to import the root certificate of the HamCloud VPN server:
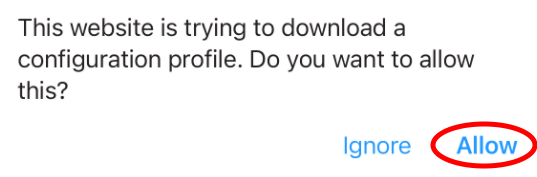
- Download the root certificate here and select “Allow”.
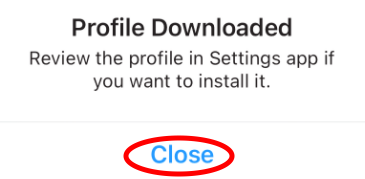
- Close the confirmation.
- Go to “Settings”.
- Select “General”.

- Select “Device Management”.

- Select “Downloaded Profile”.

- Select “Install”.

- Select “Install”.
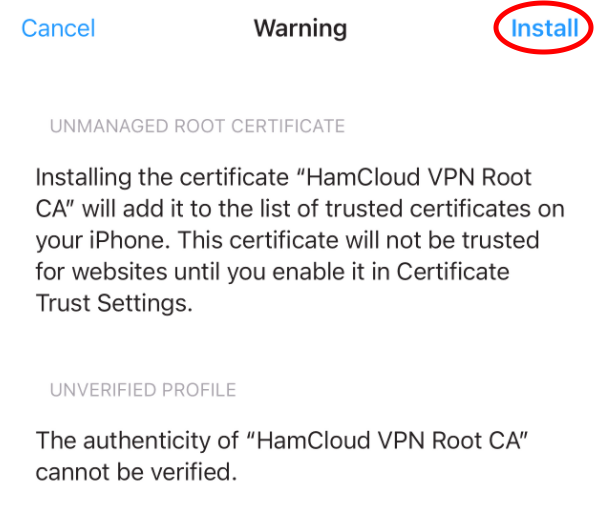
- Select “Install”.

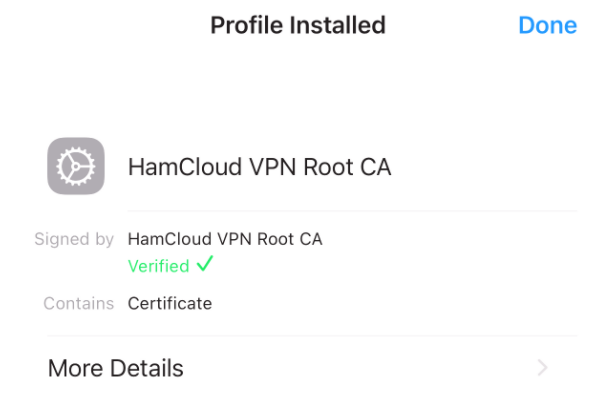
- Confirm profile installation by selecting “Done”.
The second step is to create a new VPN configuration:
- Go to Settings.
- Select “VPN”.

- Select “Add VPN Configuration”.

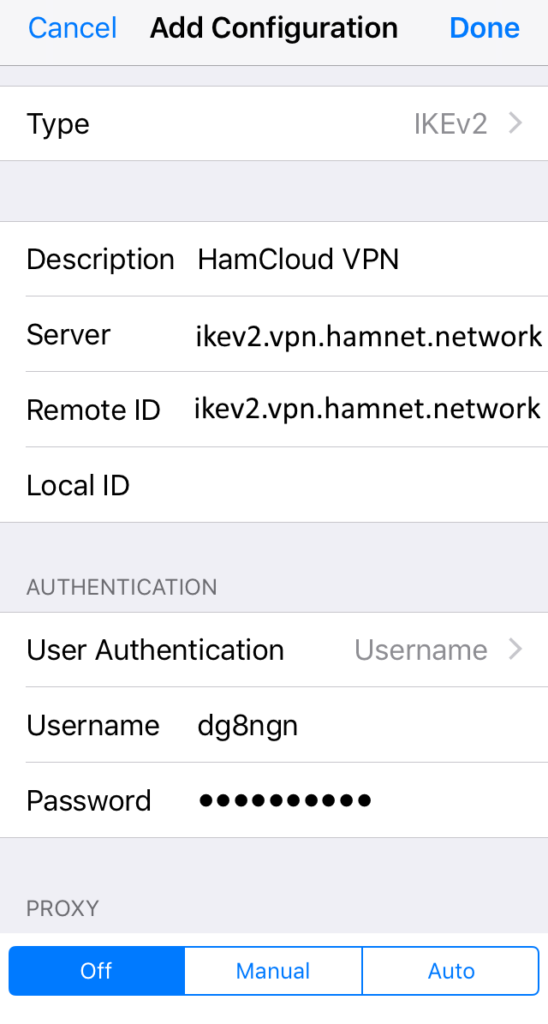
- Create the VPN configuration with the following data:
- Description: HamCloud VPN
- Server: ikev2.vpn.hamnet.network
- Remote ID: ikev2.vpn.hamnet.network
- User Authentication: Username
- Username: <enter username of VPN credentials>
- Password: <enter username of VPN credentials>
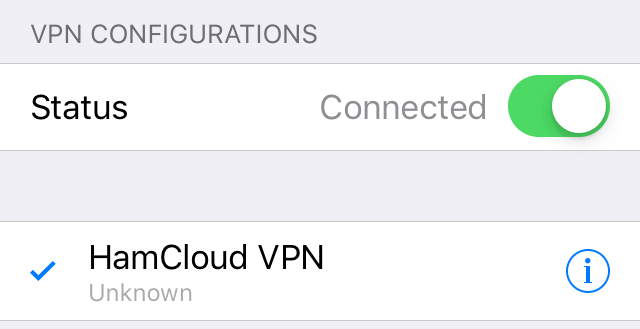
Now the VPN connection can be used:
- Select the HamCloud VPN and activate it.
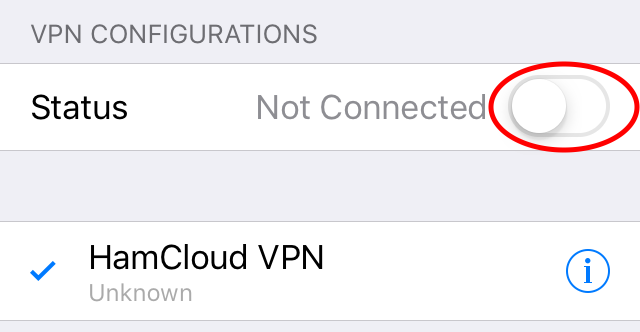
- You are now connected to the HamCloud.